
Revisiting the Past Through Film Restoration
There are many ways to do the same thing. Some are easy and quick. Others are more involved. When it comes to taking an old image from either a print or negative to a completed image, you have a range of options. Consumer scanners, like an Epson flatbed, are quite serviceable for large negatives and prints but don’t do as well with 35mm negatives. Drum scanning offers amazing image quality at an exorbitant price. Perhaps it’s time to meet in the middle.
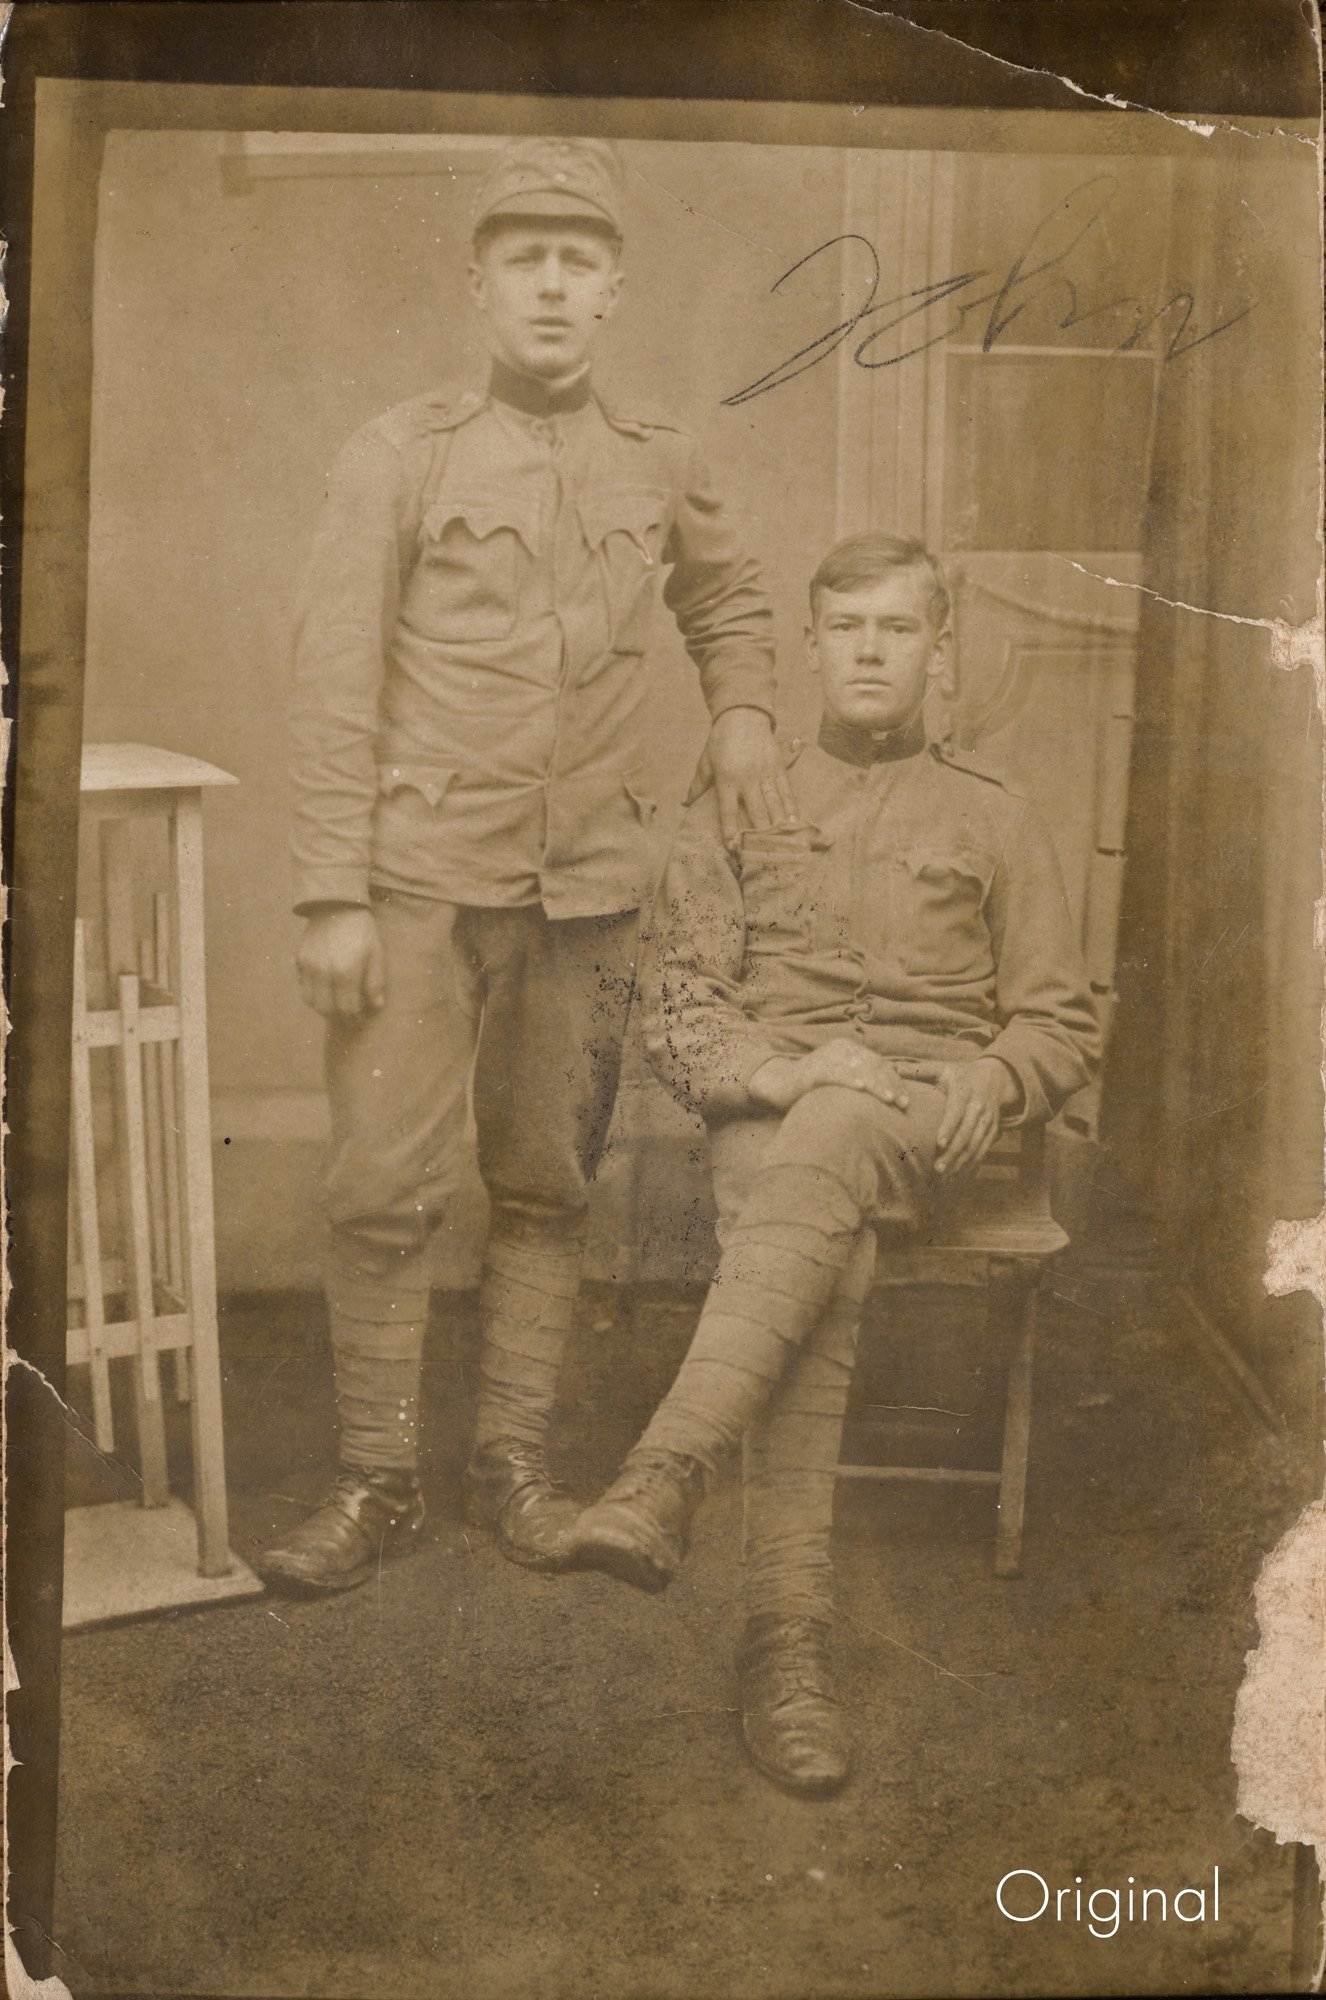
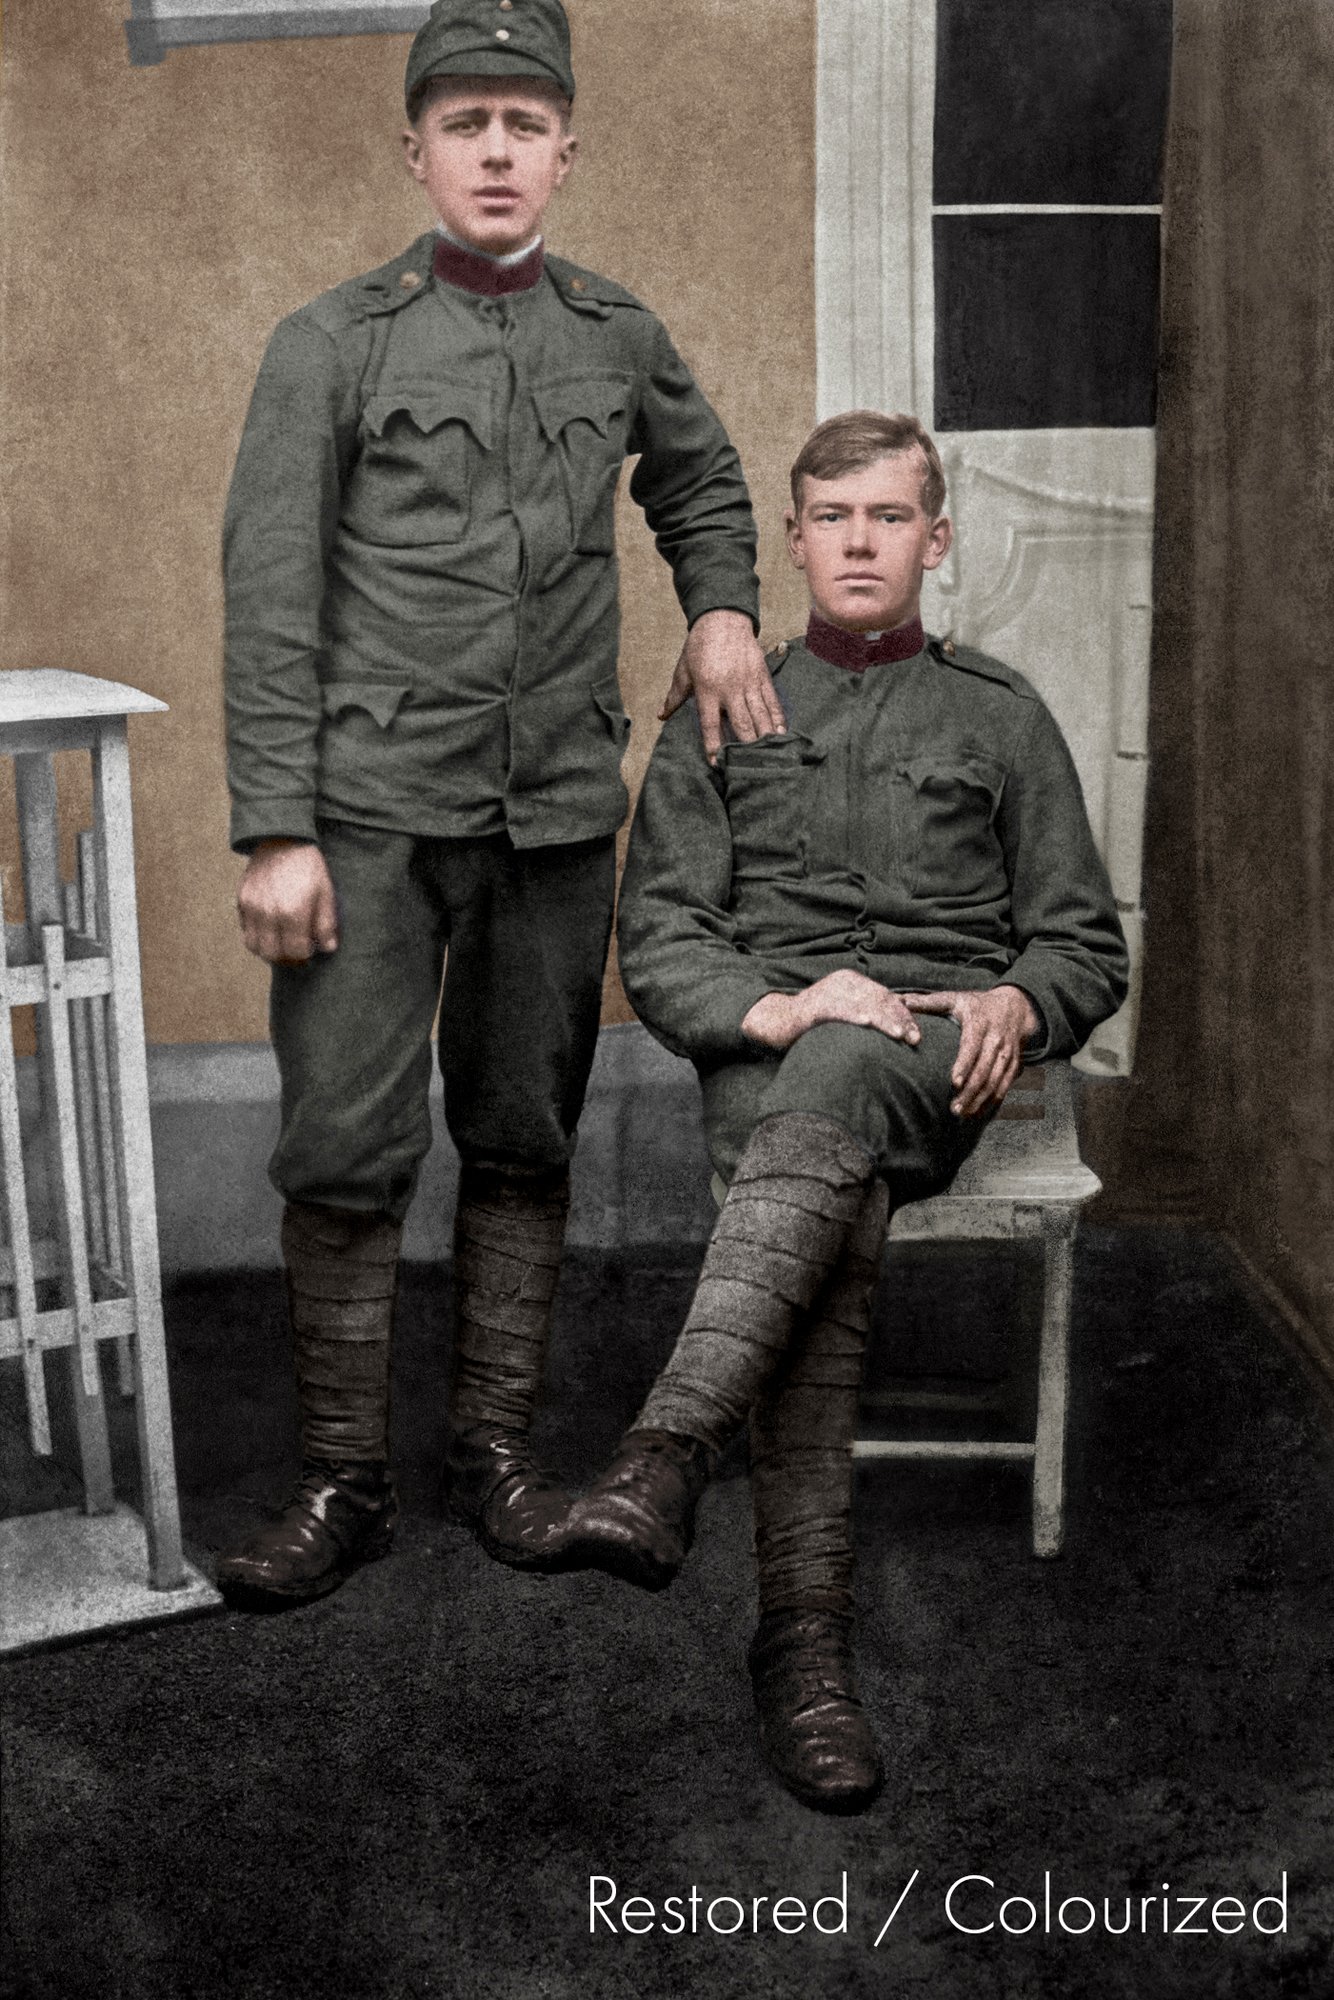
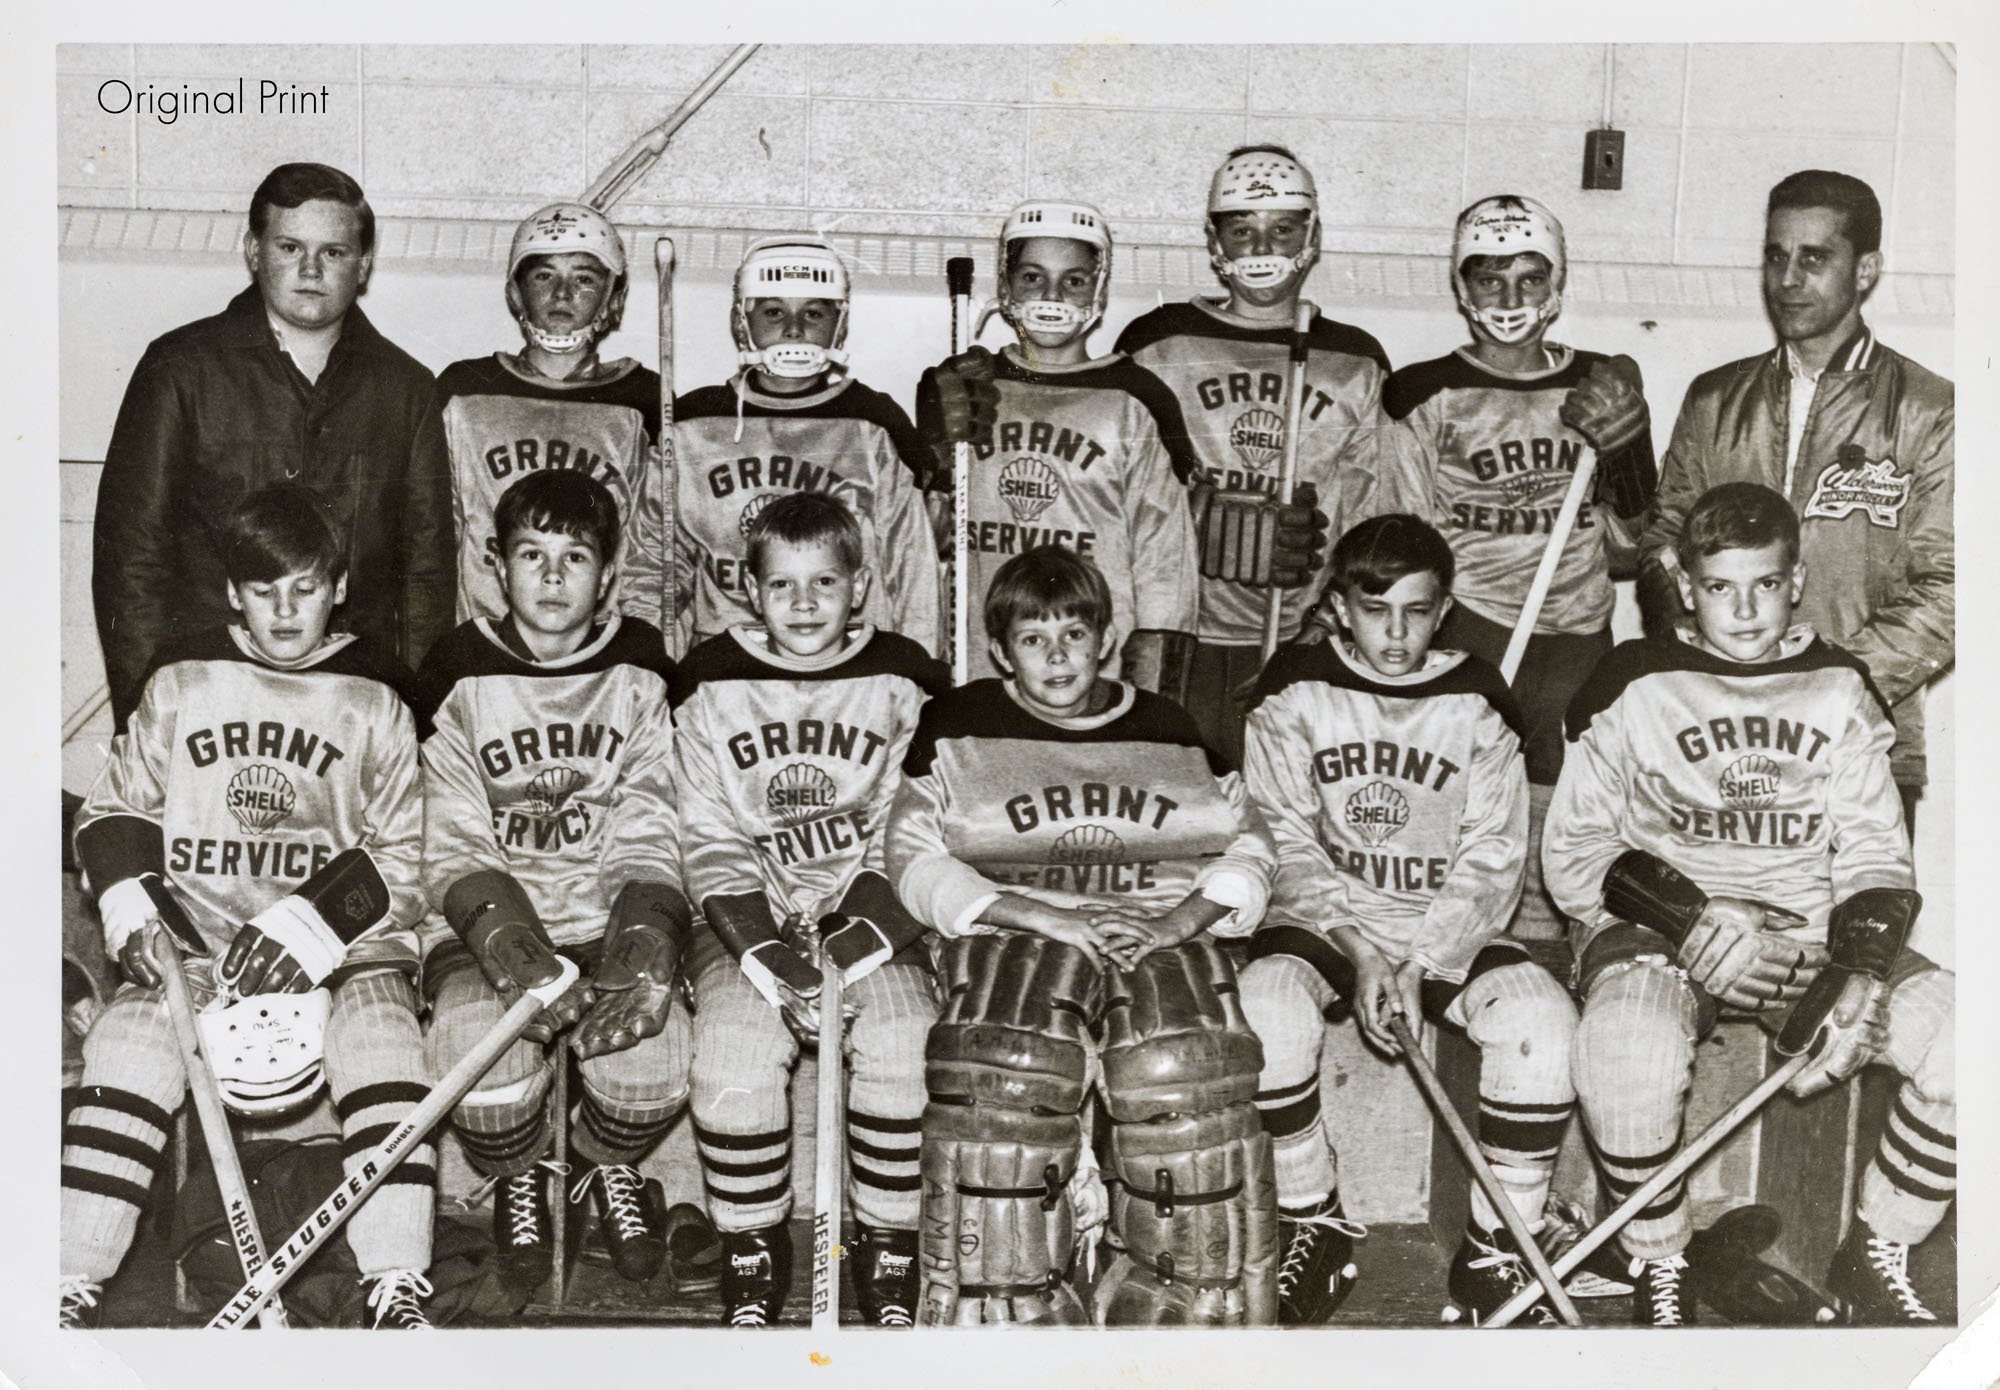
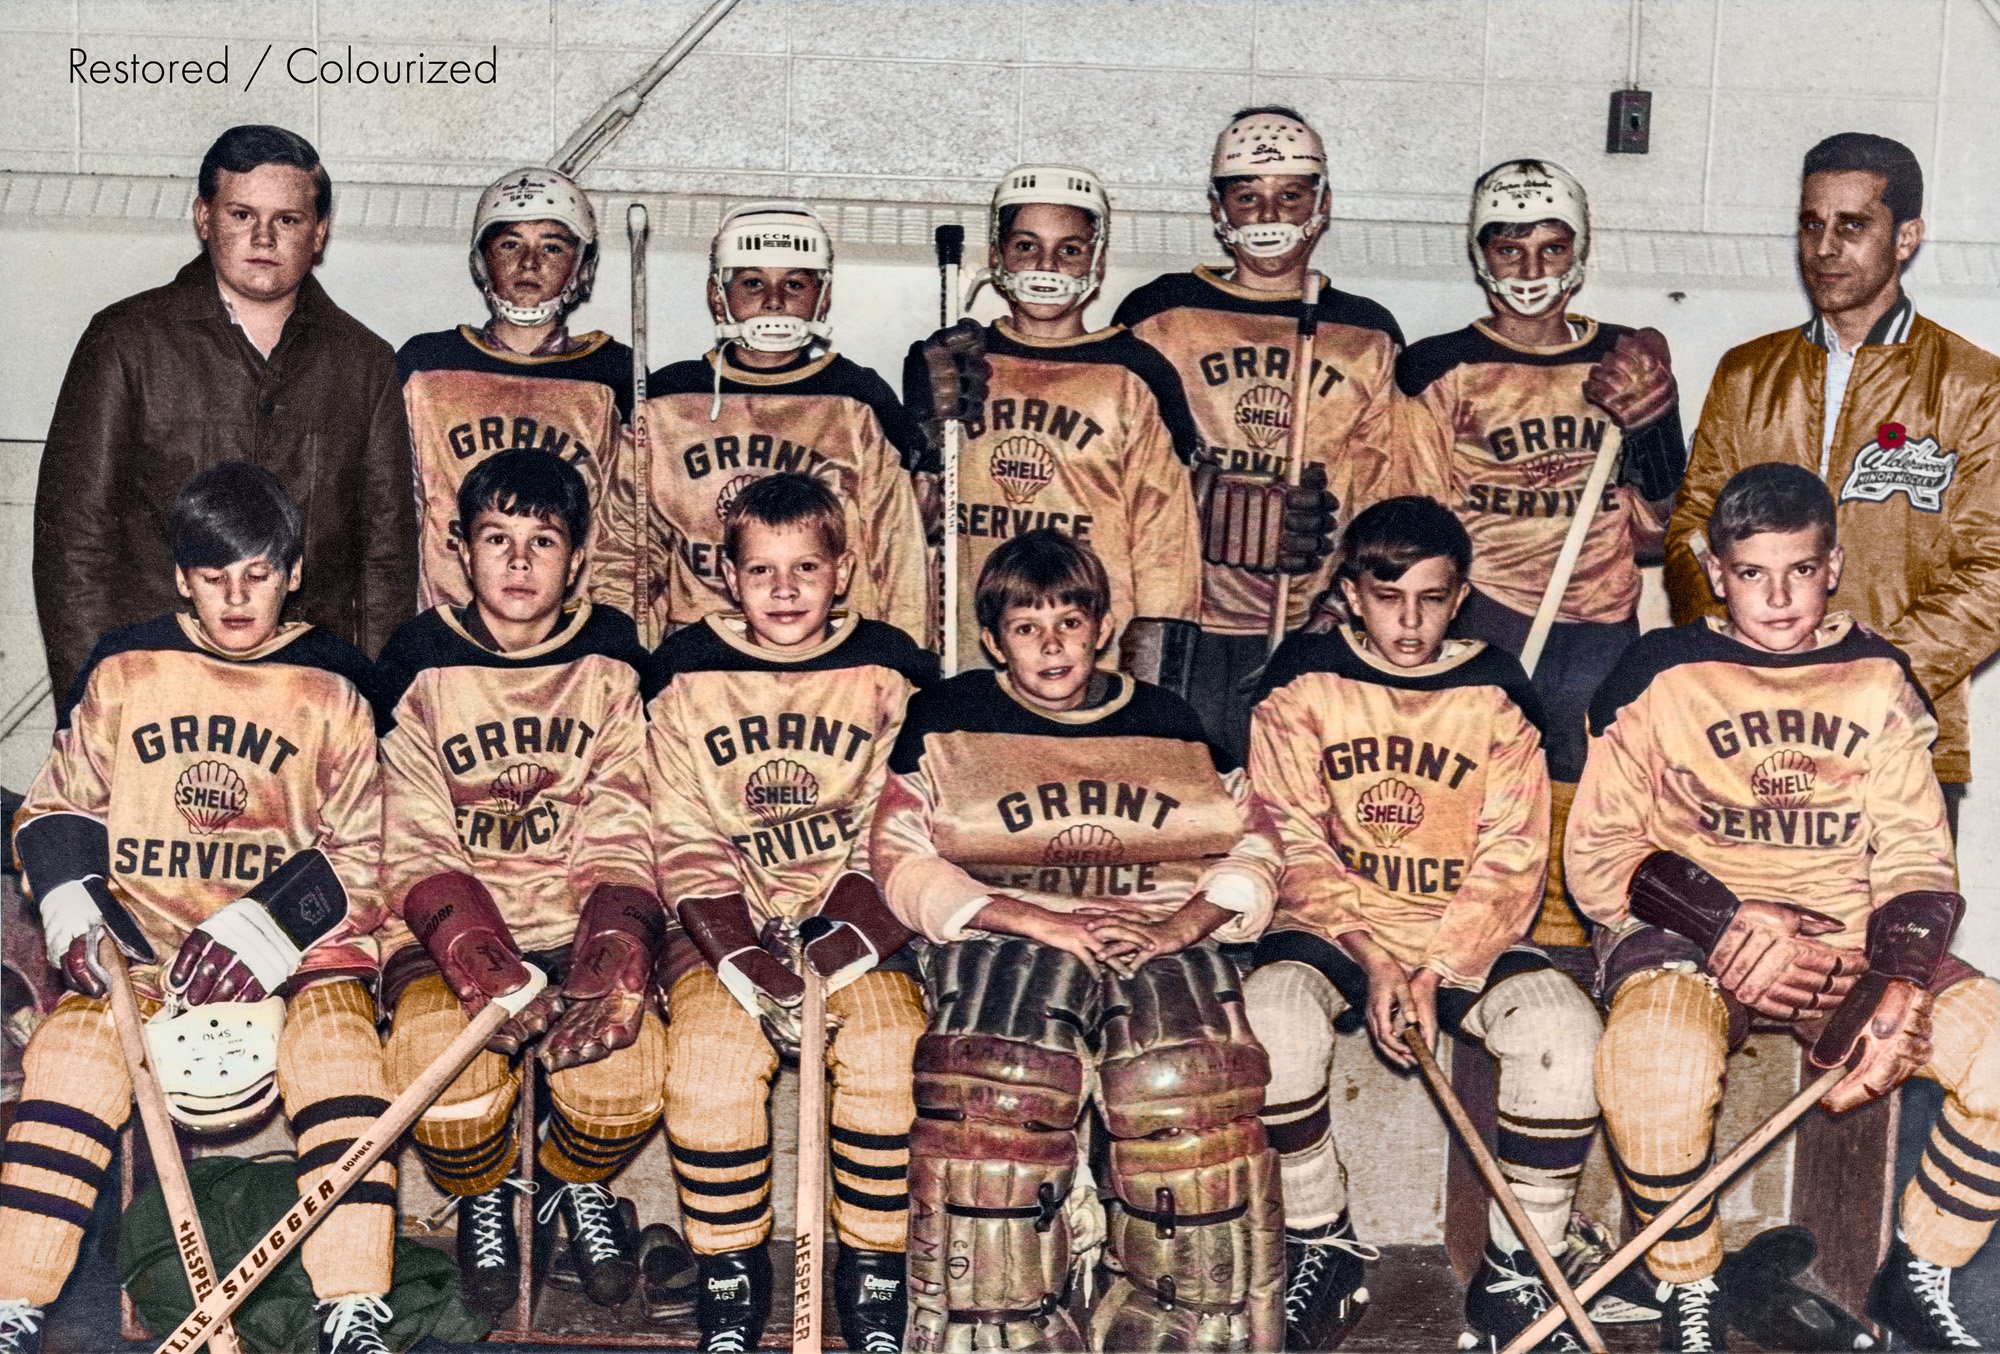
Recently, I had a client ask me to restore a photo of her husband’s grandfather. This photo was from World War I, taken in Croatia. The photo was in remarkably good condition considering its age, but suffered from some tearing and creasing, in addition to the usual discolouration.
First, the print was flattened on a workbench and my full-frame DSLR was suspended above it. After levelling the image and ensuring the print fit within the sensor area, studio lights were positioned at opposing sides to avoid shadows and create consistent light.
Next, the image was imported into Lightroom for some initial adjustments and then exported to Photoshop. At this point, I wanted to get the image to a point where the values of light and dark enhance the contrast of the subjects. In this case, I wanted to bring the two men to the forefront.
Next, I removed surface scratches and marks, moving on to the larger tears. Once the image had the distracting elements removed, the colourization could begin. This is the labour-intensive part as each element of the photo required its own colour layer, much like an animator does when creating a cartoon. The eyes, the buttons, the clothes, the chair, the ground and so on.
If possible, I request the client to tell me what the original colours were, or what they would like them to be. Often, so much time has passed that it is difficult to truly know. The goal is to paint the subject in the best light possible.
Over the next few days, the image was filled in, exactly as a painter would on canvas. It takes a few days to see how the colours and tones work with each other. Colours that worked on the first day might not blend well with other elements toward the end.
The final step was to move in closely and ensure that the layers precisely match the object being coloured and check for areas that may have been missed. Cropping was done to remove distracting border regions (and at the request of the client). The image was sent to the client for final approval before being sent to the photo lab for reprinting. They could also download the image as a digital file for sharing with family and friends.
Time passes but that doesn’t mean your memories have to fade. If you have a cherished memory on negative film or in print form, make something special for yourself or someone you care about. Hit that button below to find out more about what I can do to help you.